The Good Life Proven Process™
Step 1
We prepare your property to be move-in ready
The first step in our proven process is to get your property ready for rent. This includes maintenance and quality control walk throughs. Check out the steps below to learn more about our process.
1. Initial Walk Through
A Leasing Manager will conduct a walk through and prepare a report that identifies any repairs, painting, or cleaning that is needed. They may also note any special features of the home or safety concerns.
2. Communicate Findings with Owner
The report will be shared with you. Then the Leasing Manager will give a projected timeline to complete noted items and a target date to have the home on the market.
3. Coordinate Work Needed
The report will be shared with our network of qualified vendors who can get the work done quickly and at a fair price. For jobs exceeding the maintenance limit, an estimate will be provided for your approval.
4. Complete Painting, Repairs, and Cleaning
The Leasing Manager will coordinate the scheduling and completion of work to be finished by the target date.
5. Rent Ready Check
On average, it takes about 7 days to make the property rent ready. Once everything is complete, we’ll do a final quality check walk-through. Our team will take care of reviewing and settling the bills for the work done, all on your behalf.

Step 2
We blast market your property and manage tenant showings
The second step of our proven process is marketing your property. Learn more about our marketing strategies below.
1. Property Photos
High quality marketing photos will be taken of your property, along with any community amenities.
2. 3D Tours
Using a special 3D camera, we create a virtual walk through of the property. This allows prospective renters to see an accurate layout of the property online.
3. Online Listing
A custom ad description will be created that highlights the home’s features and amenities, as well as additional information such as included utilities, special lease terms, etc.
4. Zillow Paid Syndication
The listing will be posted through Zillow’s paid premium service and syndicated to the most-trafficked websites, including Zillow, Redfin, Trulia, HotPads, Realtor.com, and Apartments.com.
5. Lease Management
A lease will be prepared that includes specific property details, including any additional required disclosures, to ensure compliance with all local, state, and federal regulations.
6. Showings
Properties will be set up for self-access showings that allows prospective renters to view the home on their own time, 7 days a week. After an initial screening, prospective renters are given a unique one-time code to access keys in a lock box placed at the property. Once the showing is completed, they’ll be asked for feedback and sent a link to our rental application.

Step 3
Tenant screening and moving in qualified tenants
The third step of our proven process is to find the most qualified tenant for your property. Learn more about how we screen and select tenants below.
1. Application Screening
With over 10 years in business, our eviction rate is less than 1%. However, if an eviction is necessary, you’re fully covered. Good Life will manage the entire process from start to finish and cover up to $3,000 in court costs and attorney fees, which generally covers the full process.
2. Tenant Selection
After someone qualifies, we offer, prepare and send a lease to the applicant to get a signature. Don’t worry, we stand behind the tenants we select. If they need to be evicted, we pay for the eviction costs up to $3500.
3. Lease Signing
Our leasing team will follow up with the tenants to answer any questions about the lease, collect the signed documents, and collect move in funds.
4. Tenant Onboarding
After the lease is signed, we will collect a copy of their renters insurance, and if applicable, any HOA documents, and ensure utilities have been transferred. We’ll let them know when and how to obtain the keys for their move in, any special move in requirements with the HOA (if applicable), as well as important information about the rental (mailbox number, parking spaces, etc).
5. Move in Condition Checklist and Photos
Before the tenants move in, we’ll do one last check to make sure everything’s good to go. We’ll take photos to document the property’s condition, in compliance with AB2801 (Link). If needed, a final cleaning may be scheduled.

Step 4
Making the collection and disbursement of funds easy
The fourth step of our proven process is to collect rent and disperse it to the property owner. Learn about your step-by-step process below.
1. Online Rent and Deposit Payments
Most of our tenants pay their rent and security deposit via a secure online portal.
2. Owner Direct Deposit
We use a method called “full month accounting”. The rent received is held for the month so expenses can be paid. On the last business day of the month, the rent is direct deposited into your account. With this method of accounting, we won’t require an ongoing reserve and your statements will run for a full calendar month.
3. Eviction Process
In the rare instance of eviction, we handle the entire process. This includes serving the notice to pay, filing an unlawful detainer with an attorney, going to court if necessary and doing a sheriff’s lockout.

Step 5
We make renting easy
Tenant support is a fundamental pillar of our property management process. Learn more about our tenant support options below.
1. Tenant Services Coordinator
Tenants have a dedicated point of contact who they can send inquiries and concerns to. They are also provided with our after-hours maintenance phone number in case of emergencies. With these two systems in place, tenants can call or text at anytime.
2. Tenant Portal
All new tenants are given online portal access to pay rent and submit maintenance requests with ease.
3. Lease Enforcement
If tenants violate their lease terms, we swiftly take action and follow up to ensure the tenants are back in compliance as soon as possible.
4. Lease Modification Requests
From roommate changes to adding pets to installing an electric vehicle charger, we handle all lease modification requests and advise you on your landlord rights and restrictions around the request.

Step 6
Protecting and maintaining your biggest asset
We take all necessary precautions and best practices to ensure your property remains in good condition throughout the tenancy.
1. Maintenance Troubleshooting
Over our 10 years in business, we’ve found that many maintenance requests can be reduced by troubleshooting with our tenants. In order to prevent sending vendors out as much as possible, we’ve created dozens of troubleshooting videos & steps for our tenants. We make every best effort to handle the issue without incurring extra costs.
2. Vendor Dispatch
When a maintenance request does require a vendor, we use our high quality and extensive network of trusted vendors to get the job done.
3. Owner Approvals
All non-emergency work over $500 will receive your approval.
4. Repair Invoicing and Photos
Vendors swiftly send their invoices for work performed and we require photos of the completed work
5. Emergency Maintenance
Tenants can text or call our after hours emergency line so that vendors can be contacted 24/7

Step 7
Property Performance Tracking: Monthly and annual financial reports
We want to help you make the most of your rental property. That’s why we curate financial property performance documents to help you receive the most from your investment.
1. Monthly Owner Statement
On the first business day of every month we will provide you with an owner statement showing the income and expenses for the previous month.
2. Expense Payments
Monthly expenses will be listed on your owner statement and you will receive a detailed invoice and photos of the work performed.
3. Annual Cash Flow Statement
In January we will provide you a Cash Flow statement for the previous year. The Cash Flow statement will detail the income and expenses for the property. Simply give this to your tax preparer along with any other expenses you may have paid outside of the trust account.

Step 8
Annual walkthroughs
Our goal with annual inspections is to make sure we address property concerns before they become a serious expense. Check out our annual inspection procedures below to learn more about how we safeguard your property.
1. Test Smoke/CO Alarms
Landlords in California are responsible for maintaining important safety features of the home like smoke and carbon monoxide alarms. We ensure that they are installed in the correct location, not expired, and operating properly.
2. Check for Visible Leaks
All plumbing fixtures are inspected to look for visible signs of water damage so it can be mitigated before it gets worse.
3. General Walkthrough
Property photos are taken of the exterior and interior of the home along with notes on the general condition of the home.
4. Check HVAC Filter
A dirty or improperly installed furnace filter can lead to HVAC system inefficiencies and damage. We educate the tenant on where the filter is and how to change it properly if it is dirty. We will follow up with the tenant to confirm it is changed following the inspection.
5. General Photos
We take some general photos of the property to give you a birds eye view.
6. Report Sent to Owner
All walkthrough reports are stored on your online portal for easy review and reference.

Step 9
Your expert property manager proactively contacts you to review a lease renewal offer
We handle the lease renewal process for you. Learn more about how we negotiate rent increases and lease extensions below.
1. Market Survey
Comparable properties are researched and data is used to recommend the rental rate for a renewal offer. We collaborate with you on sending an offer that maximizes the chances of a renewal.
2. Lease Extension Execution
We draft the lease extension including annual disclosures required by law. We will handle all negotiations with the tenant. Once signed by the tenant, we will sign the renewal agreement on your behalf. We add this renewal document to your owner portal for you to access at any time.

Step 10
Coordinating Move outs and Security Deposit Refunds
When tenants are ready to move our, we coordinate the move out process, inspections, and disbursements of security deposits according to California law.
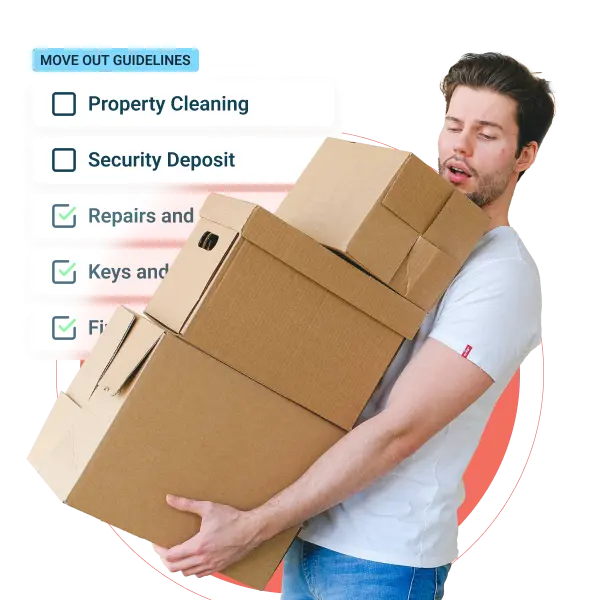
1. Move Out Guidelines
Clear instructions are provided to outgoing tenants on our property condition standards and how to give possession back to us.
2. Pre Move Out Inspection
Tenants can exercise their right by law, to a Pre Move Out Inspection. The purpose of the inspection is to identify what items may be deducted from their security deposit, and give them enough time to fix them if they choose, before moving out.
3. Utility Management
We begin the process of transferring utilities back to us to ensure they remain on during the vacancy. This is important to facilitate any needed repairs, cleaning, and showing of the property until it is leased again.
4. Final Walkthrough
Similar to our initial walk through, a Leasing Manager will conduct a walk through and prepare a report that identifies any repairs, painting, or cleaning that is needed. Additionally, they’ll identify items that need repair, cleaning, or replacement that can be deducted from the security deposit.
5. Security Deposit Disposition
In accordance with state law, any unused funds of the security deposit will be returned to the tenants, along with a detailed statement and accompanying invoices, within 21 days.
Make Leasing Your Rental Property Easier with Self-Guided Tours
Self-guided tours allow prospective tenants to view your property on their schedule—without waiting for an agent. This video explains how self-guided tours work, the security measures in place, and why they help you rent out your home faster while minimizing vacancies.

We connect your rental property with 50,000+ potential tenants to find the right fit fast.
Join our community of homeowners.


Schedule a call with a
Property Management Expert
Here’s what you’ll learn from the call:
- How much your property will rent for
- How much property management will cost you
- How long it will take to rent your property
